Land Rover - Travelling, windscreen wiper motor
Travelling
Of the three weekends it’s been since I last posted, I’ve been travelling for two of them. I haven’t done a whole lot of work on the car as a result, but that situation should change soon. The main deal this week is the windscreen wiper motor rebuild (see below), but I’ve done some other small things like filling the differentials and swivel pins with oil, and sorting out the fuel filler neck.
Windscreen wiper motor
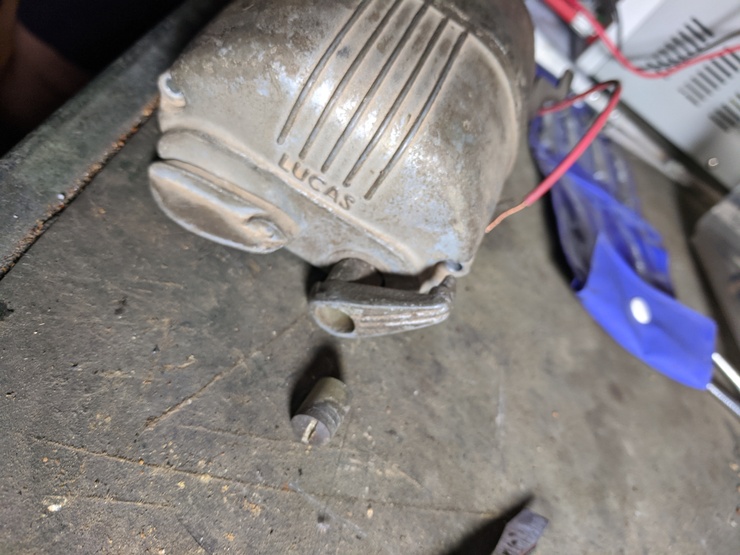
As is tradition with these Lucas FW2 motors, the old grease had solidified into something resembling squishy rust. Here’s something of a pictorial rundown on how to repair these. Firstly, remove the wiper assembly and mounting hardware, followed by the obvious nuts holding things together. Be aware that the parking handle also has a weird inverted grub screw that must be removed:
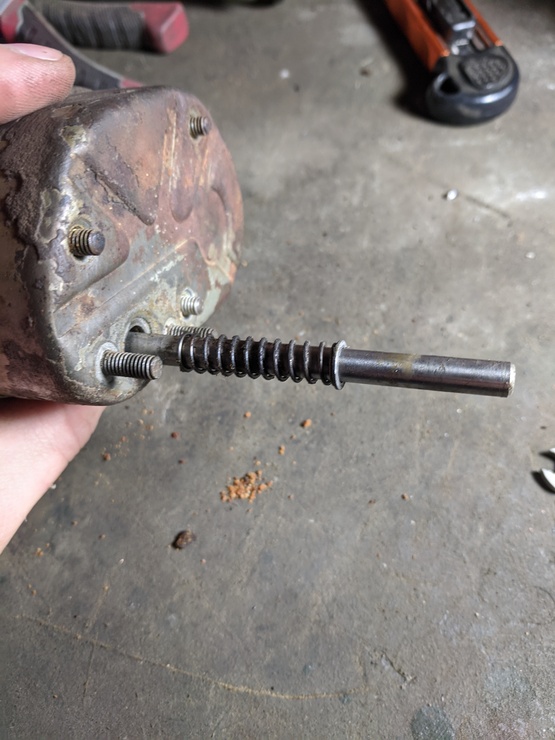
Once you’ve got that off, the case can come apart except for a circlip on the main shaft. I’ve found that wedging it out of place with a 5BA spanner, then pushing it off the shaft with a 4BA spanner works well. Be careful, since it’ll want to fly across the room as soon as it releases.

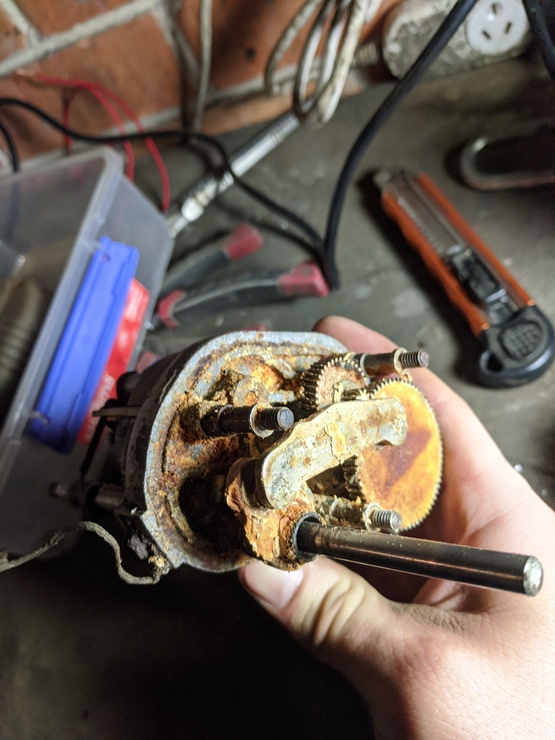
Now that those are free, you’ll probably be greeted by something awful like this. Firstly, don’t panic! Basically all of these motors look like this nowadays, since the grease has congealed. What you need to do is gently remove the horizontal linkage first, followed by the large gear and then the medium-sized gear.
If they really don’t want to come out, it’s apparently possible for the shafts to mushroom out at the back (where the motor is). Check if this has happened, and if so, gently file them back. Mine were OK, and all of the resistance was because of the dried-up grease.
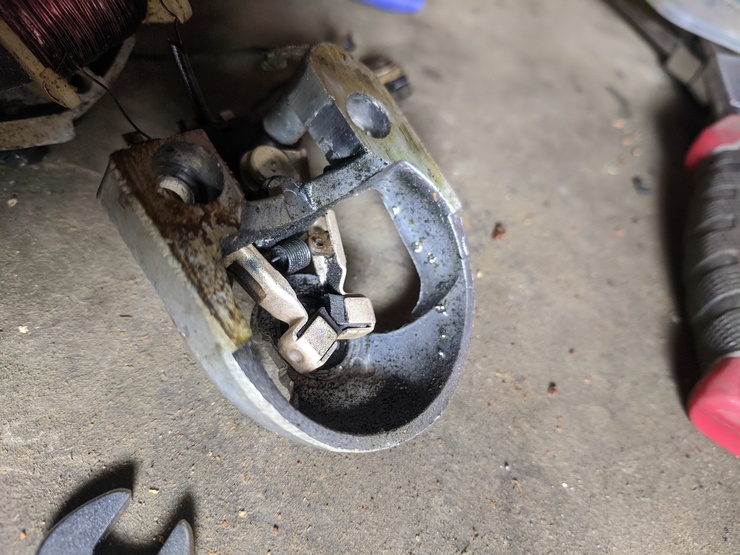
At this point, if the gears are off and the motor still doesn’t turn freely, you need to remove the rotor. This is done by removing the two nuts at the back, then gently lifting the brush mount assembly away from the rotor. You may need to undo one of the copper windings around the plastic hammer-shaped bits to provide enough slack before pulling it away.
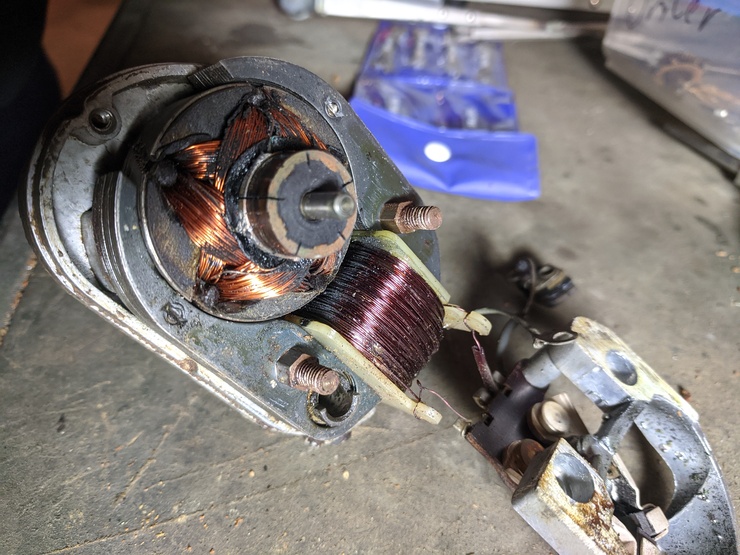
At this point, you can back the rotor out, and clean it and the chassis separately. After cleaning things up, you can now start putting it back together. I used wheel bearing grease because that’s what I had, if you’re in a cold climate I’d recommend something that maintains a reasonable viscosity at low temperatures.
Finally, a few tips for getting the brushes back in. Don’t worry too much if the brushes and the spring fall out (as happened to me) - it’s easier to get the brushes back in once the brush mounting assembly is reattached and there’s some tension against the split-ring commutator of the motor.
If the spring falls out, simply remove both of the brush arms from the pivots (the spring tension is all that holds them in place), replace the spring, and then replace the brush mounts.
At this point, things can go back together. Loosely fasten the nuts that hold the brush mount to the motor chassis. At this point you can bench-test the motor with a battery or similar, by using a screwdriver across the switch mechanism just behind the motor. Be careful when tightening the nuts down, as it’s possible to snag the motor in the arms. If in doubt, try spinning it by hand. You should now have a working motor.
Reassembly is the opposite of disassembly, and be sure to grease all of the gears and arms. For reference, my motor drew 1.5A from a DC bench power supply pegged at exactly 12V. Photos of the reassembled motor will follow shortly, most likely next week.