Land Rover - Blasting continued, rear tub done, rust removal
As mentioned in the last blog post, I think monthly will be the new normal from now on. It’s not that I’m doing less, it’s just that bodywork takes an enormous amount of time.
Soda blasting redux
I was also put behind by an issue with the place I’d lined up for soda blasting, he initially claimed he’d have them done that week, but they weren’t done when I checked. He continued to claim “next weekend” for two more weeks, until I eventually just picked them up without him having touched them. I picked them up on a Thursday, and he was still claiming they’d be done this coming weekend, so I’m not sure what he was thinking that whole time. I’ve used this place before, and he did a very nice job on the wheels, grille and bulkhead so I’m not sure what went wrong.
Admittedly, it’s not quite true to say he didn’t touch any of my stuff - one of the galvanised cappings for the top of the bulkhead had been trodden on and deformed quite badly. I managed to fix it up, but I’m still pretty unhappy about that waste of several weeks.
I ended up taking them somewhere else that did a chemical dip first, followed by soda blasting. The aluminium bits have come up very nicely, although I’ve only done half of them at this stage since that’s all I could fit in the van.
The steel parts have also come up very nicely. The blasting has made a few existing issues visible though, notably a few cracked welds, a split in the bonnet-mounted spare wheel carrier, and a few dented pieces. After blasting, the metal comes up with a slightly rough texture that I’m not sure will look right after the re-galvanising process, so I spent some time giving the visible surfaces a light sanding.
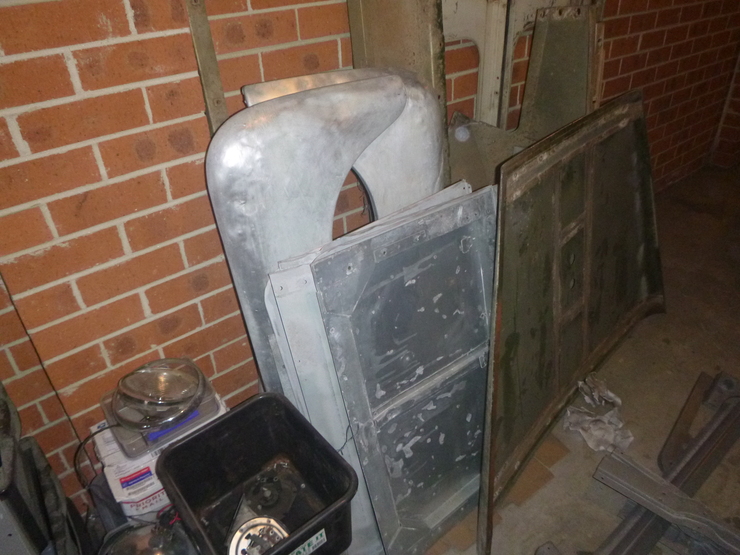
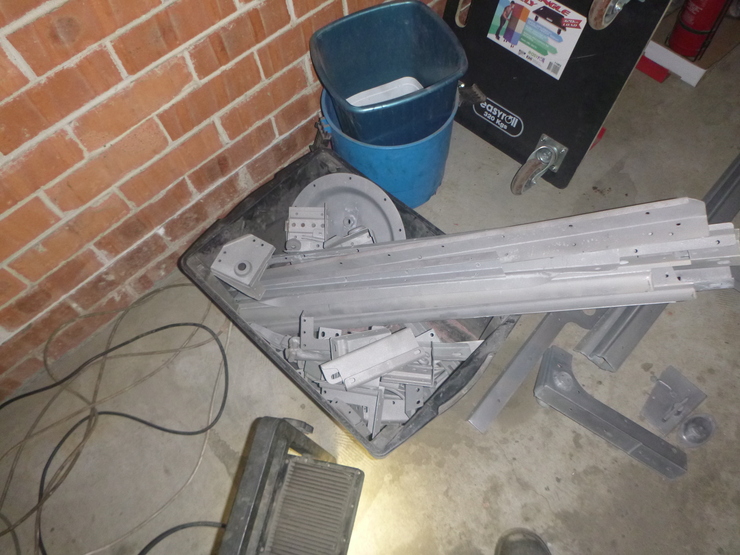
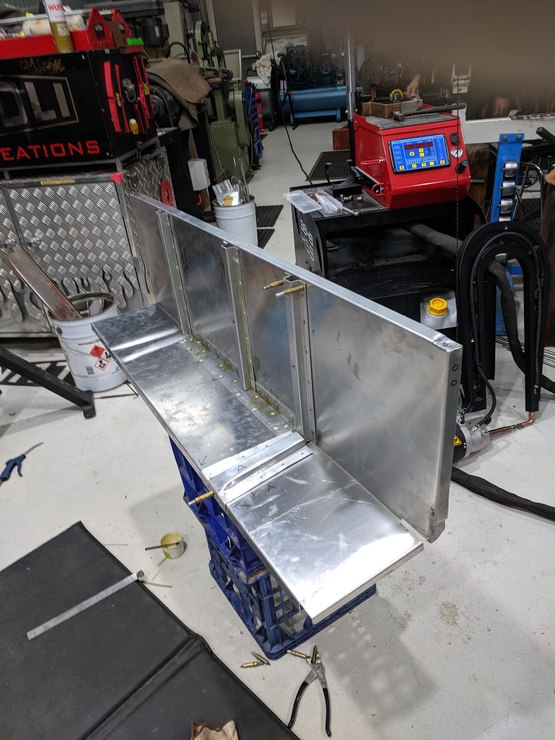
I also spent some time beating various dents and gouges out of the parts that live in the rear tub, since they’re the ones I want to do first. You can see me laying out the rough arrangement of the rear bulkhead galvanised parts on the floor right of the bucket.
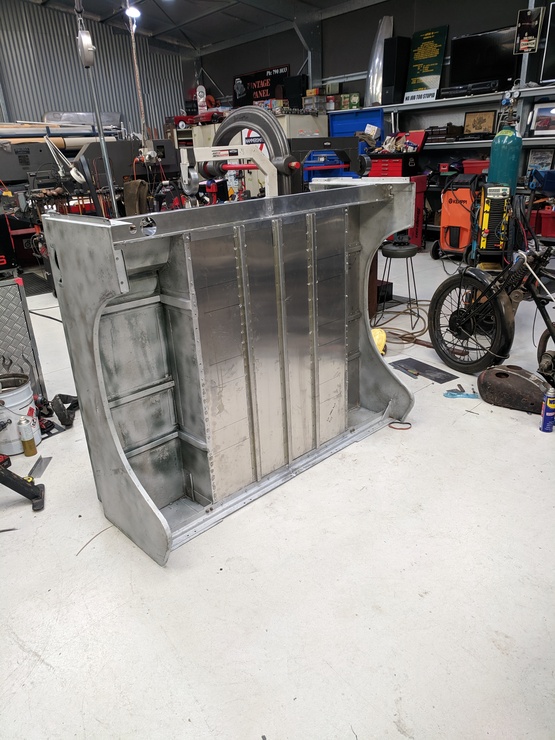
Rear tub complete
This has been a long time, and an astronomically expensive endeavour. That said, I’m extremely happy with the work that’s been done, and the effort made to reuse the original panel where possible. I worked with Mark Natoli, from Natoli Panel Creations, and given how well this has gone, I plan on working with him again for the rest of the bodywork.
We managed to reuse both of the original external side panels, as well as the driver’s side seatbox. Mark did up some excellent replacements for the floor, passenger side seatbox, and front bulkhead.
Most of this was sitting there, ready to go until the soda blasting was done, but you saw how that went, so Mark picked up the panels and blasted them himself. They came up with a slightly rough texture that I’ll need to sand back, but they’re perfect otherwise.
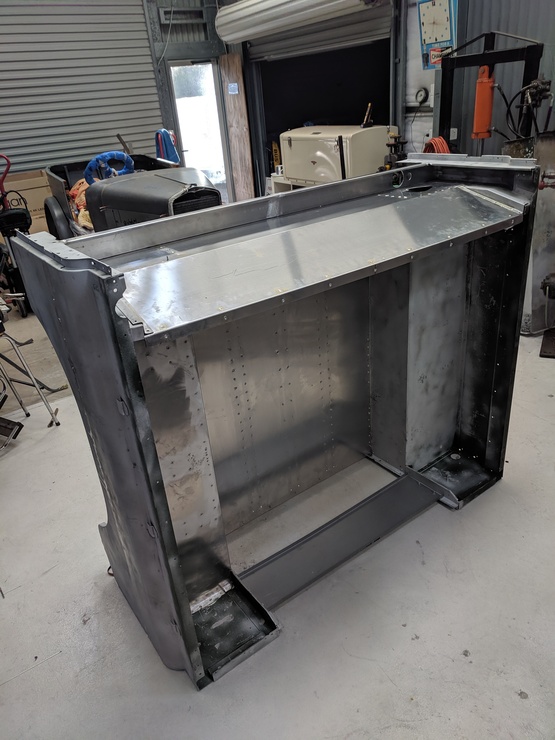
Probably the most difficult part of the whole endeavour was the spot welding. Mark had to hire a machine, and we spent about half a day with some scrap aluminium, figuring out the right settings for the machine. We got there eventually, and spent the rest of the day spot welding, as well as most of the night - we went until 10PM.
We picked up the spot welding again the next day to finish off a few small bits on the front bulkhead, as well as fixing up a few welds that hadn’t worked quite right. But once we’d sorted that, it was all done! I’m extremely happy with the finished product, it genuinely looks as good as an original, down to the locations of the spot welds. I haven’t got it back to my workshop yet, since Mark will be delivering it next week sometime.
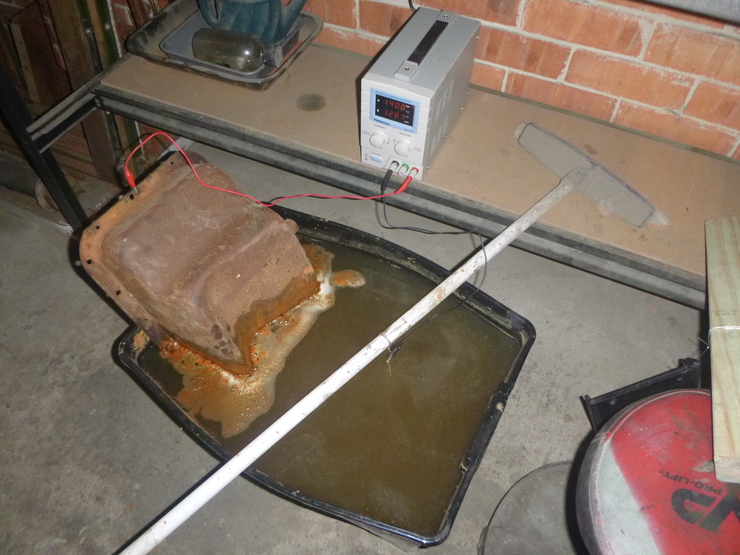
Electrolytic rust removal
As part of the bodywork, there are a bunch of steel frames/bracing that need to be de-rusted and painted. Unfortunately they’re all too big for an Evapo-Rust bath, and they’re enclosed channels so I can’t get them blasted. As such, I’m getting back into electrolytic rust removal.
I had good results with this after using it on my exhaust manifold, but I noticed the battery charger worked extremely slowly since it would turn off for a while when it didn’t get the “feedback” it would normally get from a battery. As such, I’ve got a proper DC power supply, and it’s working great so far. I’ll have some pictures in the next blog post I do. The sump in this picture is my sacrificial piece.
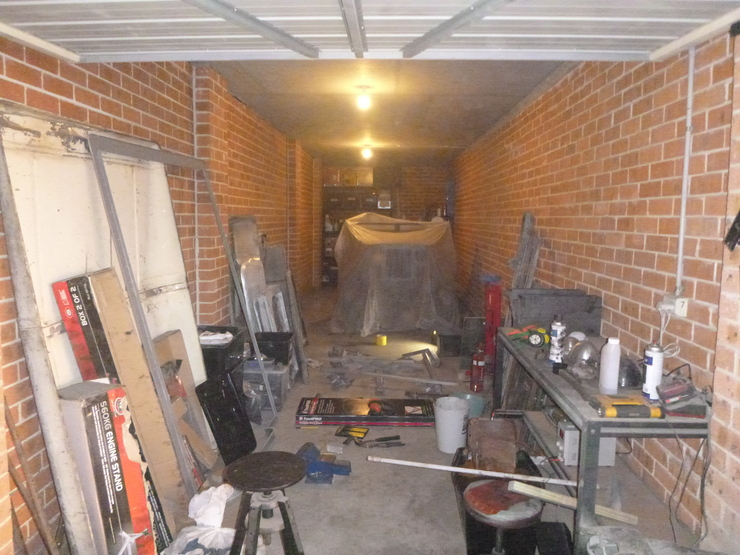
Garage overhaul
Not that important in the big scheme, but the tool/part storage situation was getting ridiculous, so I got some shelving and rearranged the whole garage. I’d planned to put the working area at the back, but I want the air compressor as close to the power outlet as possible, and the bench is convenient towards the front of the garage. I’ve also moved the car about 1.5m forwards to make room for the shelving, and there’s a reasonably-sized workspace towards the back of the car now. It may look like a mess in the photo below, but this was halfway through this weekend’s work.