Land Rover - Brakes, electrical stuff, no painting
No painting this week, again
Once again, it was raining all weekend, which means I couldn’t paint the radiator grille. The forecast for next weekend looks good, though.
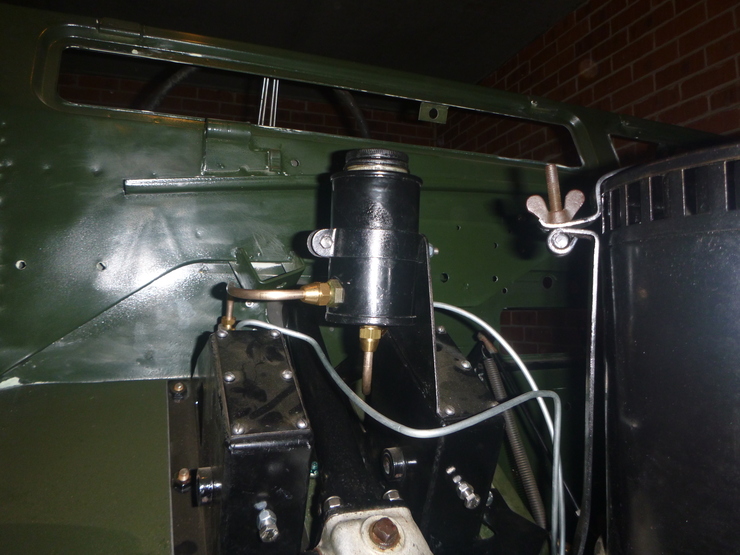
Brake reservoir
Got this finished off, and filled it with fluid. I got some silicone rubber washers, 1.6mm thick, with an inner diameter of 1/2” and an outer diameter of 1” to seal it up. I’m listing this because they are’t in the parts manual, so maybe someone else might find these measurements useful. I’ve filled the reservoir with brake fluid (DOT 5), but I won’t be able to get it braking until I’ve bled the system, which is a two-person job.
Electrical work
A while back, I bought a pre-made HT lead from the ignition coil to the distributor. Unfortunately, one end was not made at all, and the other end had the wrong connector. I sorted out the un-made end last time I did some wiring, and I finally got around to converting the other end from a push fitting to a Lucas-style acorn fitting.
As a bit of advice, I learned what “SW” and “CB” stand for on old Lucas coils - the “SW” is for “switch” (as in the ignition switch) and the “CB” stands for “contact breaker” (as in the points in the distributor). This means I didn’t need to guess which way around the coil went.
So, after I fitted up all the wires, I tested out the igntion system for the first time. I’m happy report that it’s generating healthy bluish-purple sparks.
I also noticed that my jumper leads were getting quite hot while cranking the engine over on the starter. I inspected the leads, and found that one end was separating from the clip - and that the cables were mostly rubber, with only a thin strand of copper on the inside! So I went and got some 400A-rated jumper leads, and the engine now cranks much faster. I guess the lesson here is not to cheap out on your jumper leads.
Small bits
Took the time to tick off some small-but-important jobs on my list. I got the lock tabs on the gearbox mounts sorted (surprisingly time-consuming - they’re quite thick, and hard to access), and set up the gear lever travel stops for reverse and second gear (first, third and fourth don’t have travel stops, for some reason).
I also painted (in the small spray booth) a bunch of smaller bits and pieces, and ground down my replacement brake steady posts to size (the shoe end was as thick as the outer thread, so I couldn’t insert them without removing the brake drum and shoes, which is a bit silly).
Handbrake
I got my replacement shoes from the UK, only to find that they were snapped due to the way they’d been packed. I’ve never had issues with this supplier before, and I didn’t have any issues getting my money back. Luckily, the local brake shop can get replacement shoes in, but they’re a bit more expensive. At this stage it looks like it’ll be at least a few days until I can get back onto the handbrake.