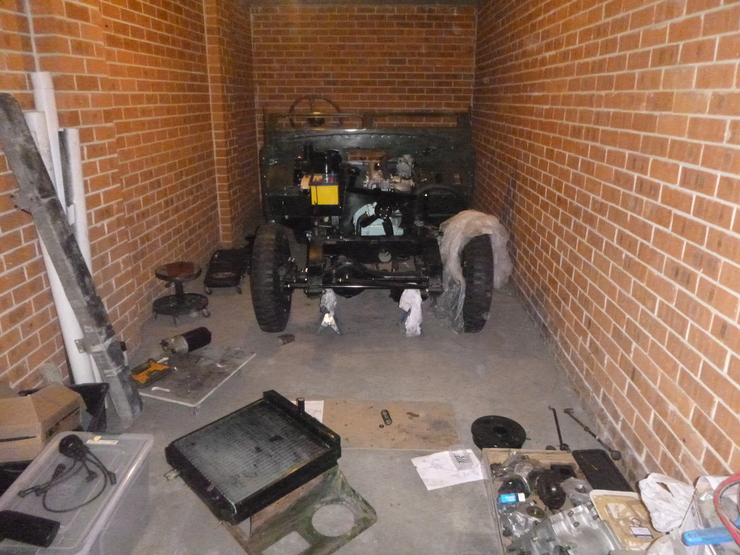
Land Rover - More gearbox work, propshafts done, starting electrics
I’ve been a bit slack once again with the blog - once all the various parts places come back from their breaks and start shipping again, I should be back to blogging once a week.
More gearbox work
Nothing to report here, just a few smaller “tidy-up” jobs. Still waiting on parts unfortunately.
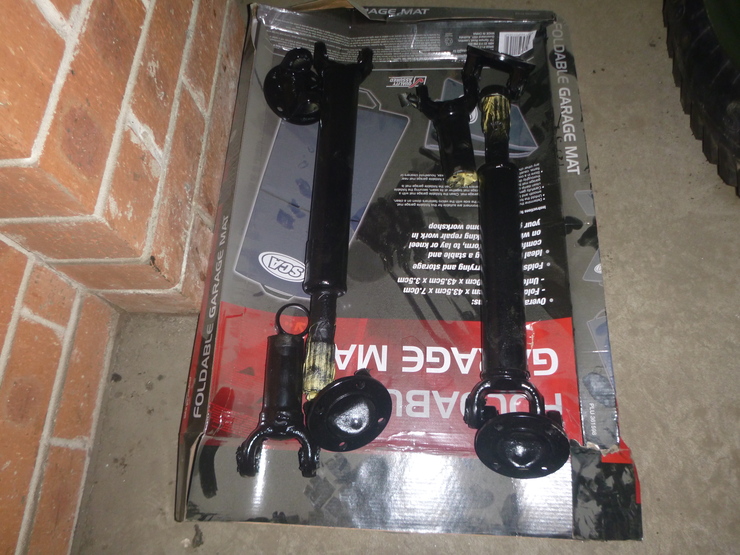
Propshafts
Again, the only major thing here is that I cleaned up and painted them. The replacement gaiter and universal joints are in the same parts order as the gearbox, so they’re probably still a couple of weeks away.
Starting on electrics
Since I’m so badly stuck on parts, I’ve been doing all of the small jobs around the engine bay - all of the small things I’ll have to do before I try to start it. The main thing is the distributor. The distributor itself is quite easy, and I’ve replaced the condenser and points. Here it is, all ready to go back in:
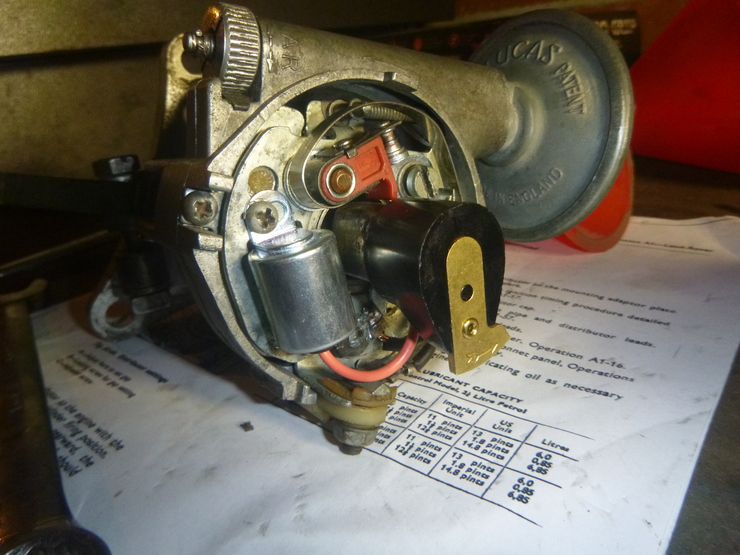
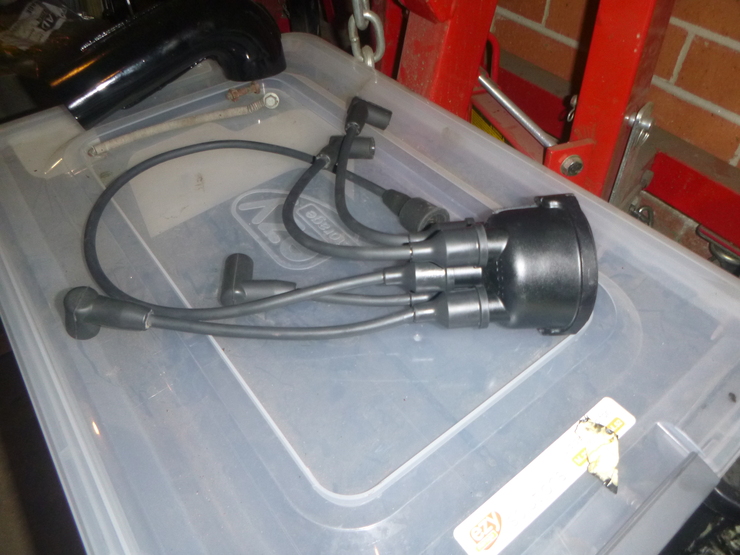
I’ve also painted the original distributor cap using Eastwood’s plastic treatment. It’s come out quite nicely, but the real test will be in how well it lasts. The other thing here is that I’ve constructed all of the leads. I couldn’t find any good instructions for these acorn-style connectors elsewhere on the internet, so here’s a writeup.
For the “corner” ends, start by feeding the outer, rubber part of the corner over the wire. Dielectric grease helps here. Then, strip about 15mm off the end you just fed the corner part over. Fold this stripped part back over the wire, so it does a 180° turn. Then, pull the wire through the metal part of the corner piece, and crimp it down. Mine had two spots for crimping, one that was meant to go through the insulation, and another that crimped over the folded-back core. Then, slide the rubber corner forward over the metal corner. At this point, you’re done, and it’s a good time to test your connection.
For the distributor ends of the HT leads, feed the boot over the wire (use dielectric grease again). Then feed the threaded acorn connector on. Strip between 5mm and 10mm of wire, then feed the “fan disc” over this exposed core. Then, fan out the exposed twisted cores over the fan disc. This should hold the disc in place against the non-stripped part of the lead. Then, go around the outside diameter of the fan disc and cut off any excess strands of the fanned-out core wire.
I realise this process could have done with some pictures - if you’re stuck, send me an email and I’ll try to do some illustrations or something.
Installing the distributor drive gear
This was a really painful process, so I’m going to document it here in case anyone else has trouble. Unfortunately the workshop manual just says to install it at a certain angle, and to line up the hole in the bushing before installing the grub screw.
It’s not that simple though, since installing the distributor drive gear causes it to rotate in place, and the bushing also rotated for me. To get the required 20° offset from the centre-line of the engine, I had to insert it at 315°, or around 4 o’clock. To get the hole in the bushing lined up, I found it best to insert it around 265°, or just past 6 o’clock, since mine rotated slightly upon insertion. I also found that shoving the driving gear in as quickly as possible helped to avoid the bush rotating relative to the engine block.
I also needed a few other tricks - you might be luckier than me and not need this advice, but it’s here just in case.
I ended up dropping the sump (thankfully I hadn’t filled it with oil, and the bolts were only finger tight to hold it in place). This let me remove the four bolts holding the oil pump together, which meant I could use the oil pump drive shaft to push the distributor driving gear back out whenever I needed another attempt.
I also scraped the bushing at the bottom, in line with the hole for the locating grub screw. This is because, with the oil filter adaptor off, you can just see the very bottom of the bushing, so this helped me locate it horizontally. To locate it vertically, I stuck a small pipe cleaner through the hole for the grub screw, and pushed the drive gear back up until I felt in engage. Then, after locating it by feel using the pipe cleaner, I held it in place using one hand, while driving in the grub screw using my other hand. It’s an incredibly fiddly process, and I’m not sure why Land Rover decided to do it this way. Regardless - it’s in! I ended up spending most of Saturday on this, unfortunately.
Misc. small things
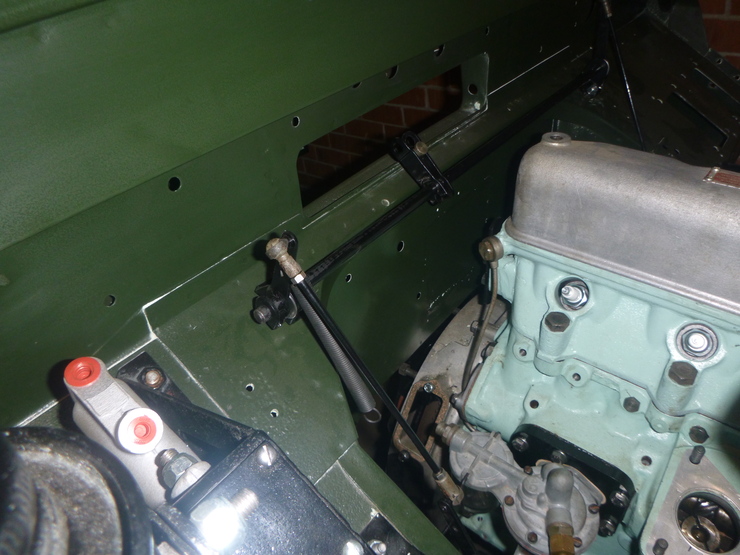
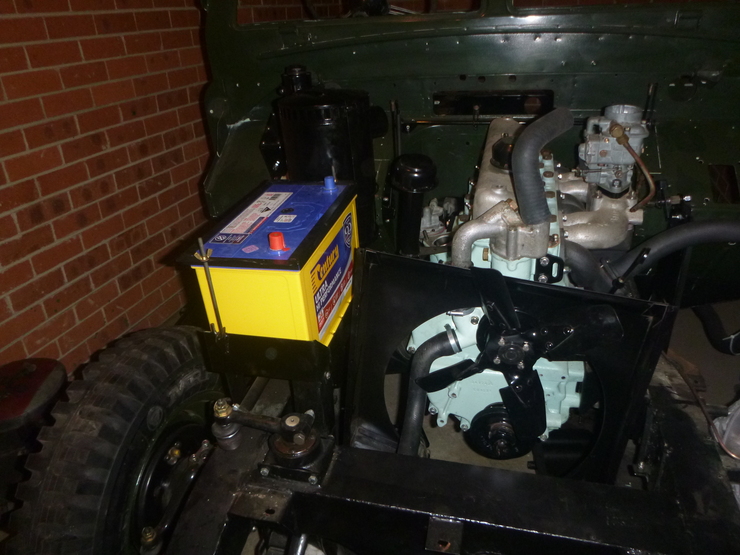
Nothing worth a section on their own, but I’ve sorted out the air cleaner and battery holder, as well as buying a new battery. I’ve also installed a decent chunk of the accelerator linkages, but I’m waiting on parts (again!) before I can finish this job.
You can also see that I’m test-fitting the radiator and hoses, again in preparation for the first start.