Land Rover - Steering finished, engine stuff
Apologies for the two-week gap between blog posts, I was pretty tired after last week and didn’t get around to writing a blog post. On the plus side, this entry has twice as much stuff in it!
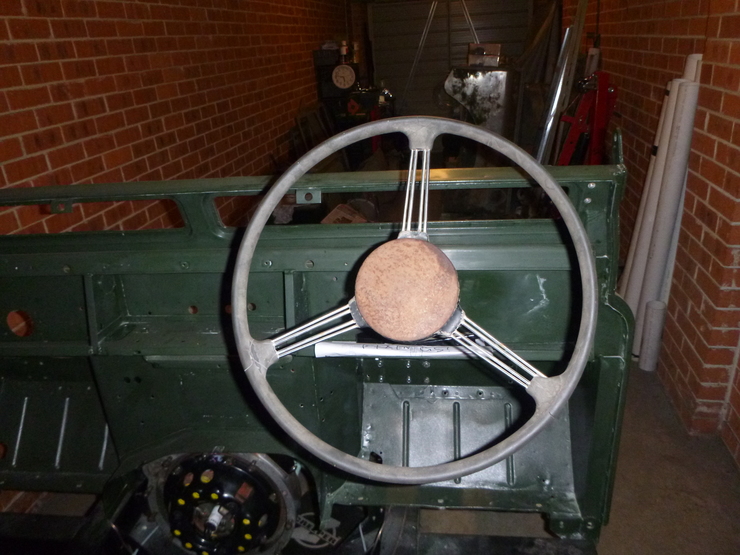
Steering finished
As usual, this took a bit more time than I thought, but it’s done! There’s an obvious exception in the photos below, which is the steering wheel - my goal was to have the steering functioning by the time my lease was up for renewal, in case I had to move again. I’m happy that I’ve met that goal, and it lets me work on other things on my own time a bit more.
The braces around the top of the steering column are cleaned up and ready to be re-galvanised, but they’re currently sitting in a tub with the rest of the stuff that needs to be galvanised. This is because the minimum charge I could find for galvanising was $180, so I want to save up a bunch of pieces (around 10) before I pull the trigger. I could fit them in the space of 10 minutes though, so no big deal.
I’m happy with the steering - the lock stops are set up, it’s centred, and I’ve set the toe-in. I’d be happy to take that steering set up out on the road, so I’m calling it done (above caveats aside).
You might notice in the above photo that I’ve buffed and polished a few areas of the bulkhead around where I’m working. This is because I like to get in there before I install stuff, while it’s nice and flat. I’ll do a more complete buffing and polishing job for the bulkhead and wheels soon.
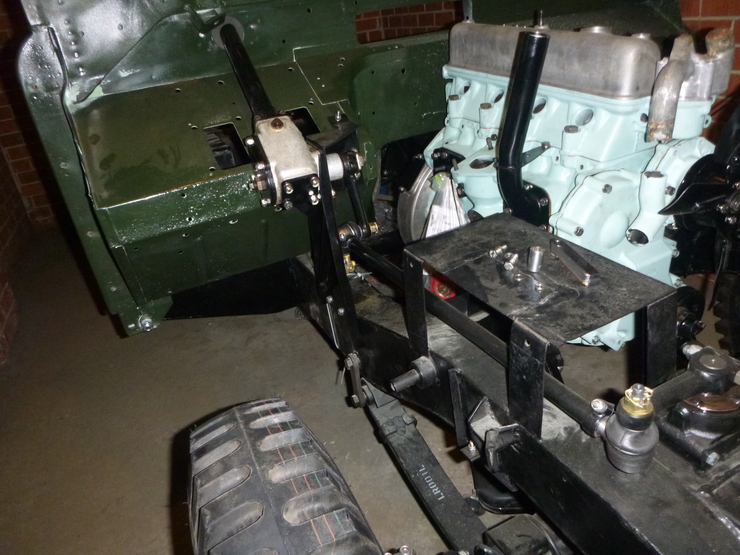
You can see in the photo above that I’ve installed the crankcase breather and the front cover/water pump - see below for details on that. The crankcase breather was just done to save space.
Valve timing set
This wasn’t too unpleasant, despite having an earlier engine without the in-built timing marks. The process is a little fiddly, but it was much easier once I bought a dial gauge and made up a frame for it to attach to the rocker arms. I also got lucky in that the first offset I chose for the camshaft chainwheel was perfect - I can imagine it getting quite tedious to get so close to the end and realise you can’t get the timing chain taut.
Front cover and water pump
Once I set the valve timing, the engine front cover was good to go back on. This was reasonably straightforward, with the exception of choosing the bolts and studs - you need a fairly weird array of lengths and sizes, and it didn’t help that I got sent the wrong parts for some of the fasteners. Anyway, it’s mostly back on, and the few empty fastener holes you can still see are for the 1/4” UNC bolts, which I’ve ordered from a local fastener shop and should be done soon.
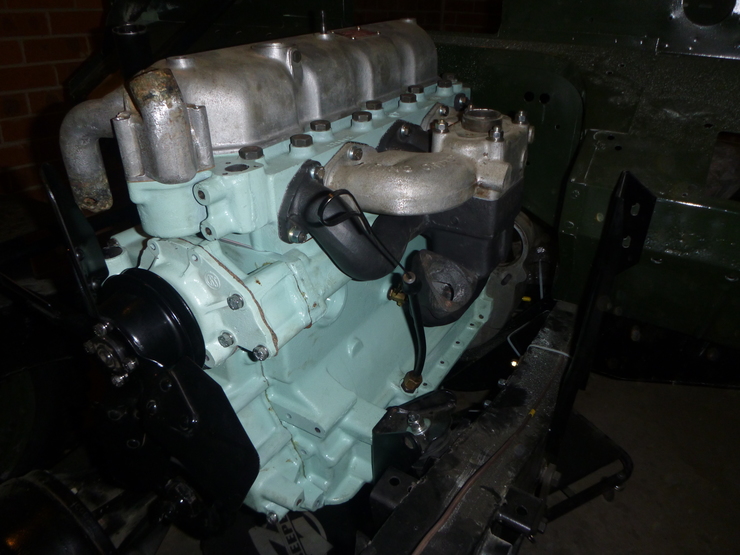
I also took the liberty of fitting the crankshaft pulley, starter dog, and fan. This was mostly done to save space, but it certainly is motivational having a complete-looking engine! The rocker cover and thermostat housing are just sitting there to stop dust etc. getting in.
Clutch and flywheel
This wasn’t too interesting, except that I’m really glad I had a clutch alignment tool lying around - would’ve been quite a painful job otherwise. There is some rust on the clutch pressure plate, but it’s only surface stuff and the rest seems in good shape.
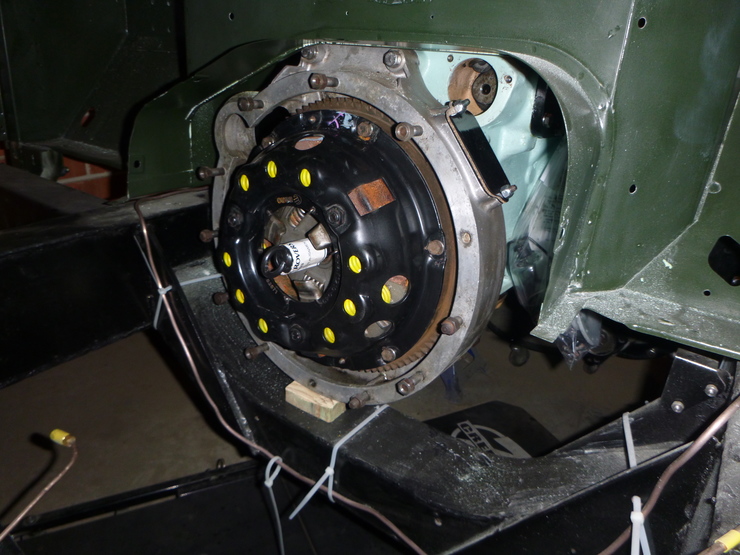
You might notice that the clutch alignment tool is still installed - I’m paranoid the clutch plate will somehow fall down despite being in there pretty tight. You might also notice that the triangular cover for the rear of the camshaft still isn’t installed - it’s a devil to access that lower bolt with the bell housing installed, so I’ll have to shorten one of the bolts before I have a go at it. I think I can get it, it’s just fiddly and something I didn’t have time for.
Manifolds done
As you probably saw above, the manifolds are done. This was reasonably uneventful except for the usual drama with the fastener kit containing the wrong fasteners, but I had the right ones on hand so it all worked out fine. I suspect the kit is for the later type “straight-through” exhaust manifold.
Oil pump
Unfortunately, this isn’t as finished as it looks in the photo below - my unit was missing the little ball that serves as a pressure relief valve, so I’m glad I checked - otherwise it would’ve just pumped oil around the sump! This might have been one of the issues leading to the seized piston I had to remove when first dismantling the engine. I’ve ordered replacement parts, but they have to come from the UK so I’m unlikely to get this sorted within the next week.
I was disappointed I couldn’t get the oil pump finished, since I was looking forward to getting the sump back on and saving a bit more space, and ticking another job off the list. I wouldn’t have been able to install the oil filter, since I’m missing the small grub screw that goes behind it and holds the bushing for the vertical drive gear - another one has been ordered.
Fuel pump mostly rebuilt
It was sort-of visible in the second picture (with the steering arms), but the fuel pump is mostly rebuilt. My unit is missing the oil seal that sits in the heart of the mechanism, so it’s just the two halves in a plastic bag hanging from the engine for now.
I’ve ordered a whole new fuel pump (they’re only $50 for some reason) that I can hopefully “reverse salvage” the oil seal from.
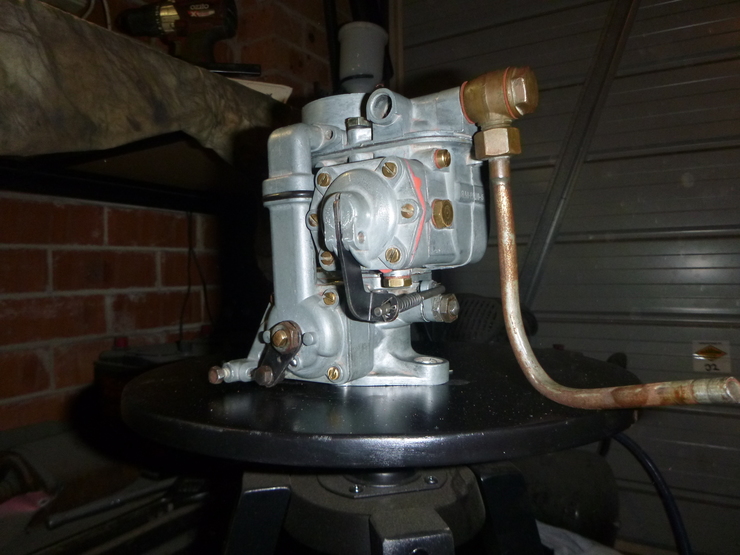
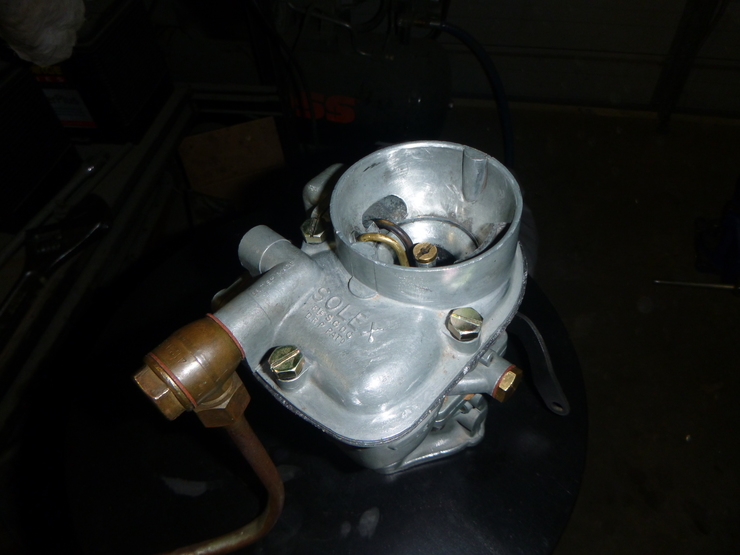
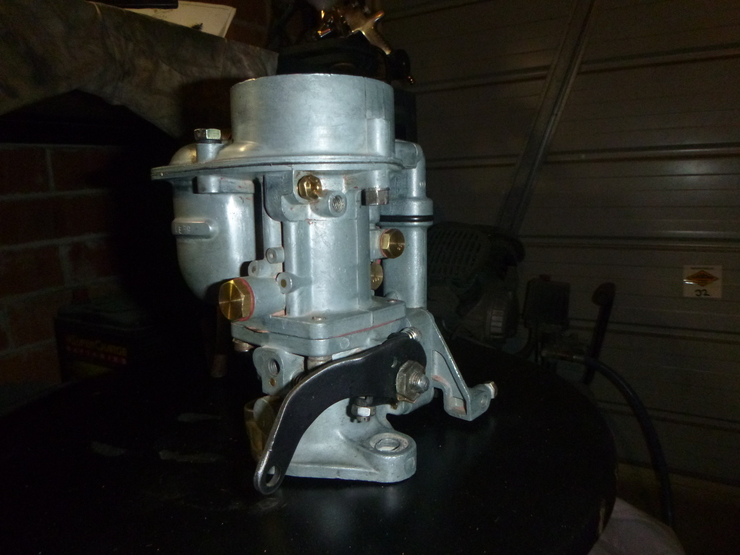
Carburettor rebuilt
This took the better part of two days, since I found some paper gaskets that looked as though they might’ve had asbestos. So, I had to do it all wearing my proper gas mask, leather gloves with nitrile underneath, and spraying water as I went. Once that was all removed, the disassembly was fairly easy, and the reassembly also went a bit more smoothly than I hoped.
One thing that took much longer than I thought was removing what looked like caked-up dried fuel in various locations - it hardens to something with the consistency of weak sandstone, and takes ages to remove.
Below are some pictures of the finished product - I’m missing one screw holding the the starter to the top cover, which I’ll have to make. It’s serviceable as is, due to the other screw. There’s also a broken stud holding in the choke tube, so I’ll have to get that sorted at some point. These jobs can both be done with the carburettor together, thankfully. I also haven’t gotten around to cleaning up the fuel inlet pipe yet.