Land Rover - Test painted first body panels, more petrol tank
Still no bulkhead or engine
Like it says in the heading - I haven’t got the bulkhead or engine back, which is a shame since I’d planned on doing at least one of them this weekend. Both the machinist and the panelbeater are once again claiming “towards the end of next week”, but I’ll believe it when I see it.
General cleanup
As stated last week, I went over everything I’ve done so far and gave it a wash with some soapy water. Not a large amount since I didn’t want water sitting anywhere for an extended period, but enough to clean all the gunk off.
Panels buffed and polished
I forgot to take a photo of these, but they look extremely similar to the last photo of the smaller panels on/around the bulkhead, except without the “orange peel” effect, and much shinier. I’ll post some photos next week. For those who may find it interesting or useful, here’s another step-by-step procedure, this time for sanding/buffing/polishing panels. Again, I’m being very explicit with all the steps, so that I don’t make mistakes when following the procedure, and so I can get a consistent finish across all the panels.
- Wet sand 1200G (up/down motion)
- Set up buffing machine (woolen pad)
- Apply Mr Buff (15cm apart)
- Work compound in (level 1 on machine)
- Buff (level 3 on machine, spray water)
- Apply Mr Buff (15cm apart)
- Work compound in (level 1)
- Buff (level 3, spray water)
- Apply Mr Buff (15cm apart)
- Work compound in (level 1)
- Buff (level 3, spray water)
- Set up buffing machine (waffle pad)
- Apply swirl remover to pad
- Work compound into panel
- Remove leftovers (microfibre cloth)
- Apply polish (microfibre cloth)
- Remove excess polish (microfibre cloth)
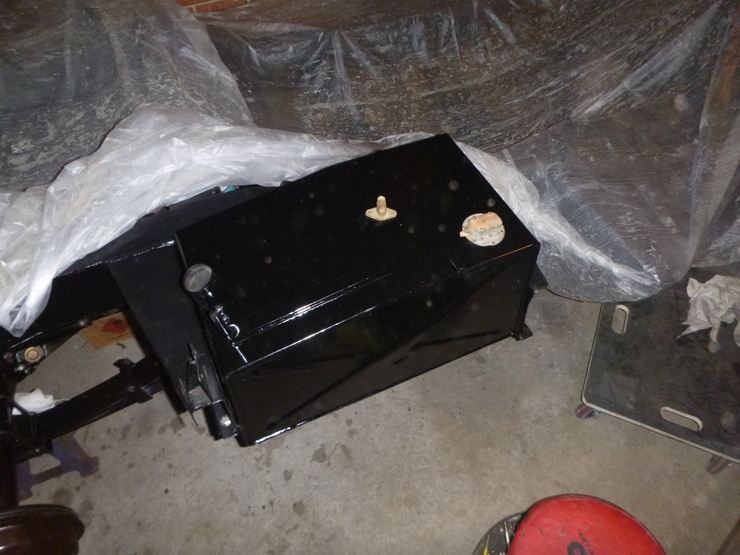
Petrol tank
This took much longer than I anticipated, but I still managed to get it done this weekend. I cleaned out the interior of the petrol tank by sealing up every hole except the drain plug at the bottom, then putting about 1L of acetone in, rotating the tank around, and then blasting it with a higher-pressure hose. I then sealed the bottom, and unsealed the sender unit hole at the top of the tank, and repeated the procedure.
For cleaning the exterior, I was lucky that I didn’t need to clean between the tank and the caddy, since removing and replacing those is a fairly difficult job. Instead I treated the whole surface (including all the nooks and crannies) with rust converter, then soldered over any gaps between the tank and the caddy.
A word of advice - I wore gloves and a gas mask for the entire job, since I wasn’t sure how much lead was left in the tank after 30-ish years of leaded petrol. I’m glad I did, since my gloves had that dull, lead-coloured shine afterwards as if I’d been handling pencil lead (graphite). I might also go for a blood test to make sure I’m safe.
After cleaning it, painting and mounting was fairly uneventful. The fuel pickup and sender unit are just sitting there so I don’t lose them - they aren’t done yet.