Land Rover - Brake lines, more petrol tank
Still waiting on parts
Similar deal to last week, where I had a few small pieces arrive during the week (mostly fasteners). The bulkhead is still at the panel beater, and most of the engine is still at the machinist. He said he’d start working on it this coming Monday, so hopefully I’ll get that back reasonably soon.
Brake pipes incorrect
I received the brake pipes this week, so I’d originally intended to fit them this weekend. I measured them up on Friday night though, and ran into a few issues. First, here are the lengths of the original brake pipes:
- Front-left: 2040mm
- Union to rear: 1070mm
- Rear-left: 900mm
- Front-right: 750mm
- Rear-right: 485mm
And here’s what came in the kit (minus some of the shorter ones from the master cylinder to the union):
- Front-left: 2132mm
- Union to rear: 1609mm
- Rear-left: 842mm
- Front-right: 775mm
- Rear-right: 501mm
Most of it is reasonably close, although the rear-left is about 5cm too short, which may prove to be an issue. But the biggest problem with these lengths is the pipe from the union to the rear, which is about 540mm too long. I suspect I’ve been sent a kit for a long-wheelbase (109”) model rather than my 88” wheelbase - 540mm is almost exactly 21”, the difference in the wheelbase (which that pipe has to cover).
Another issue with the kit is that one of the connectors has a metric fastener installed. None of the brake fasteners on the car are metric, and it doesn’t thread into the brake pipe union. As a result of the above, I’ve got in contact with the manufacturers of the kit, and I’ll have to wait and see what happens.
Painting equipment
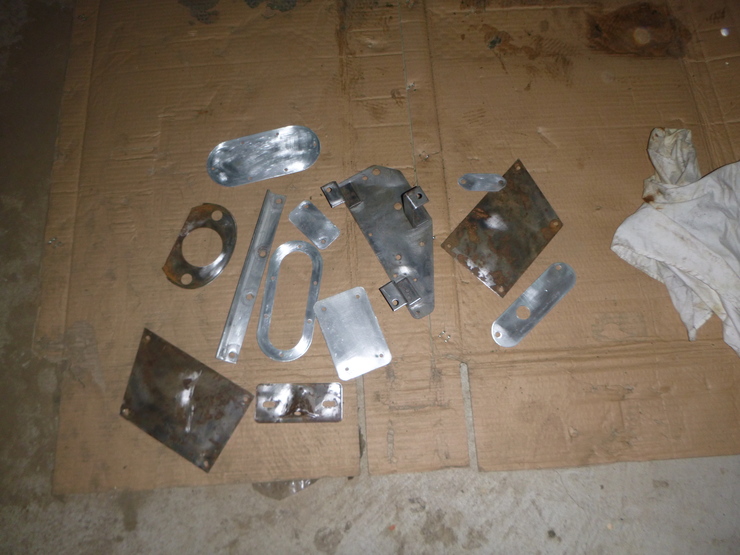
As a result of not being able to install the brake pipes, I decided this weekend to paint some small, less-visible panels to make sure my setup was OK and that I will be ready to paint the bulkhead when it arrives.
It takes two days to paint anything, since the etch primer needs to dry overnight before the acrylic can go on, and I can’t leave etch primer sitting unprotected for an entire week. So, I went and got the bits I needed early Saturday morning, hoping to start the primer around midday.
Unfortunately, this all took much longer than I anticipated, and I couldn’t get the primer done on Saturday, which means it needs to wait until next week. This turned out to be for the best, since something came up on Sunday and so I probably wouldn’t have been able to paint then anyway. I did manage to finish paint stripping and sanding everything, and I also tested that everything worked using a scrap piece of metal. Here’s a photo of the sanded pieces:
Hopefully I’ll have some nicely painted bodywork next week, and my setup will be good enough to paint the bulkhead. In case anyone finds this useful, here’s an exhaustive list of everything I’m using for painting. I wouldn’t normally do a list like this, but getting a painting setup for the first time needs a surprising amount of gear:
- Ross 36L 205L/min air compressor
- Iwata Air Gunsa AZ3 HTE with 1.8mm tip
- Dedicated air regulator at gun
- Air gun cleaning kit
- Paint stripper (4L)
- De-ox-it (1L)
- Wax and grease remover (4L)
- Wet/dry sandpaper (240, 400, and 800 grits)
- Sanding block
- 1K etch primer (4L)
- General-purpose thinner (4L)
- Black spray paint for tracing coats between primer
- Custom-mixed acrylic paint (4L)
- Acrylic thinner (20L)
- Tap for 20L barrel of acrylic clear
- Acrylic clear (4L)
- Disposable mixing cups
- Conical paper filters
- Thinner squirt bottle
- Mixing sticks
- Tack rags
Petrol tank
I looked up some information on how to repair those tanks, since I was nervous about welding such thin metal. It turns out I was justified in being nervous, since any cracks are meant to be brazed instead of welded. Since brazing is even more difficult than welding (and I’m not great at welding), I decided to try out a “cold weld” putty, which is meant to dry so hard that it can be threaded. I’ve applied it, and I’ll try sanding it next week (and cleaning up the excess putty) and see how it holds up.
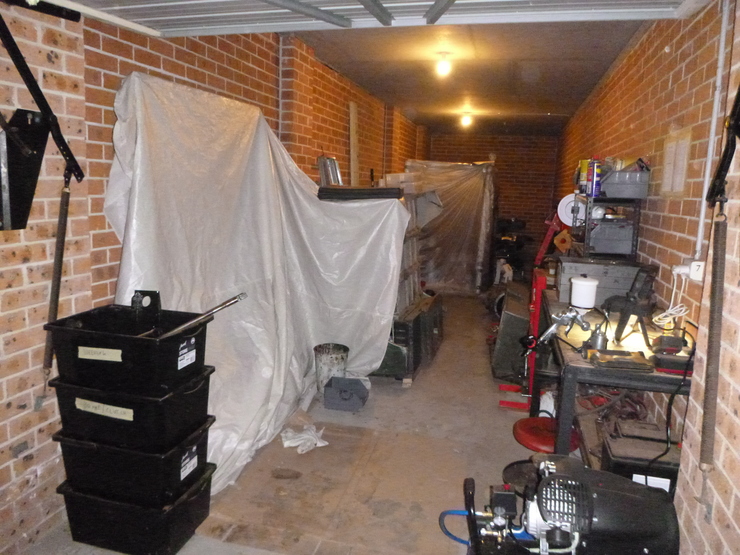
Painting the tank is on hold briefly, since I needed somewhere relatively dust-free to store the new painting equipment, which meant I had to sacrifice my paint booth.
Here’s an overall view of the garage at the moment, note the canvas on the left covering up some bodywork - I’ll need a few more plastic sheets to cover the workbench and boxes of spare parts. Also note the new spray gun setup on the workbench at right of frame: