Land Rover - Manifolds
Engine picked up
My engine got picked up on Thursday, it was all pretty uneventful. I’m missing one set of valve collets, I couldn’t find it in any storage boxes or the workshop floor, but it’s only $10 for a replacement so I might simply order a replacement.
Manifolds pulled apart
There was a bit of a trick to this. To get the carburettor off the inlet manifold, I noticed that the nuts securing the carburettor on the two large studs didn’t come off because they fouled the bottom of the carburettor. So, I continued to remove the nuts, which lifted the carburettor off the inlet manifold.
Once I’d done that, I had better access to the final bolt fixing the inlet manifold to the exhaust manifold, which eventually yielded to a metal breaker bar and a few hits with a hammer. I’m not sure about the physics involved, but there’s definitely a difference between gently applying force to the end of the breaker bar, and hitting it with a hammer - the sudden impact seems to do a much better job of releasing stuck fasteners.
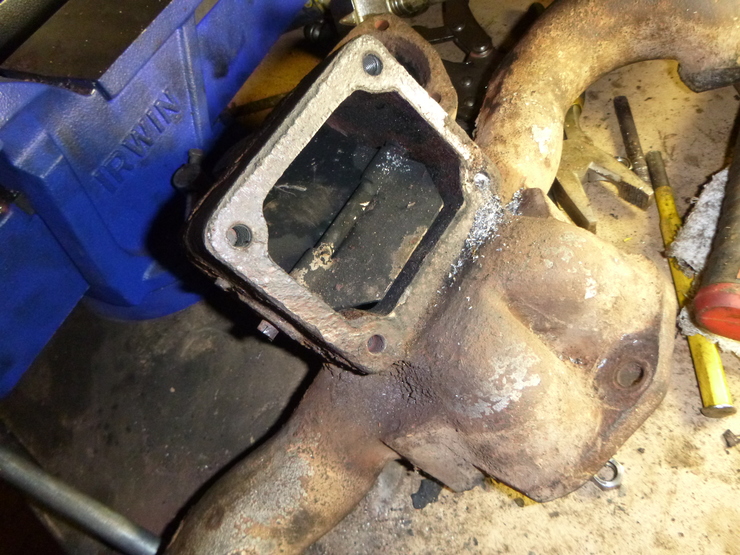
Once I had all the major components separated, it was time to remove the various studs still hanging around. For the studs in the exhaust manifold, I managed to remove two of the three using a bench vice - it worked well to lock the stud into the vice, and then turn the manifold itself around, which gave loads of leverage. Unfortunately the third (and final) stud sheared about 3mm deep into the hole, and when I tried to extract it with a screw extractor, the screw extractor sheared off, level with the hole. I think I’ll need to bore this out and re-tap the thread. You can (just) see the problem in the bottom-right thread:
The same trick worked well for the inlet manifold, and once the studs were off it was fairly easy to remove the large rubber piece at the base of the carburettor, by securing it in a bench vice and rotating the inlet manifold around it.
Mostly finished cleaning
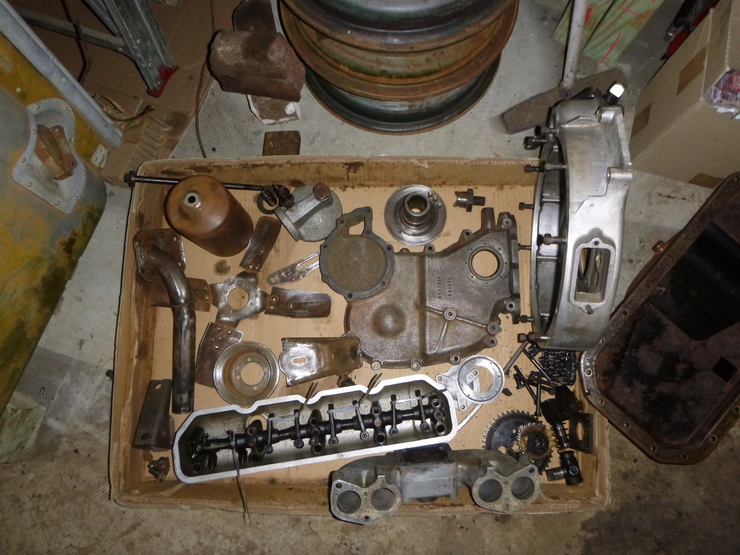
With the exception of the exhaust manifold (which I’ll come back to later) and the thermostat water outlet pipe (which still has a bolt stuck in it), I’m done cleaning parts. The cast aluminium stuff generally came up well, and you can also see the cleaned-up sump off to the right:
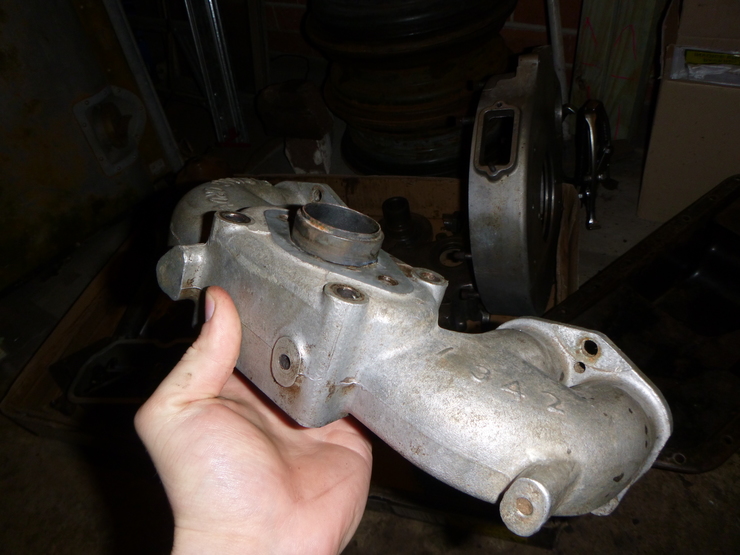
The inlet manifold didn’t come up as well as I’d hoped, but it still looks pretty good:
Exhaust butterfly valve
This was a total disaster of a job. For those who don’t know (which is practically everyone, information on this is hard to find), the exhaust manifold contains a butterfly valve attached to a bimetallic spring. The purpose of this is to redirect the hot exhaust gases up to the base of the inlet manifold in cold weather, thus heating the incoming air.
Unfortunately, it was so badly rusted that literally every bolt used for disassembling it completely sheared as soon as I applied even a small amount of torque. What I ended up doing was hacksawing through the shaft for the butterfly valve and removing the external components, where were in terrible shape. The three circular bits in the middle, one of which is strung out, are the remnants of the bimetallic spring.
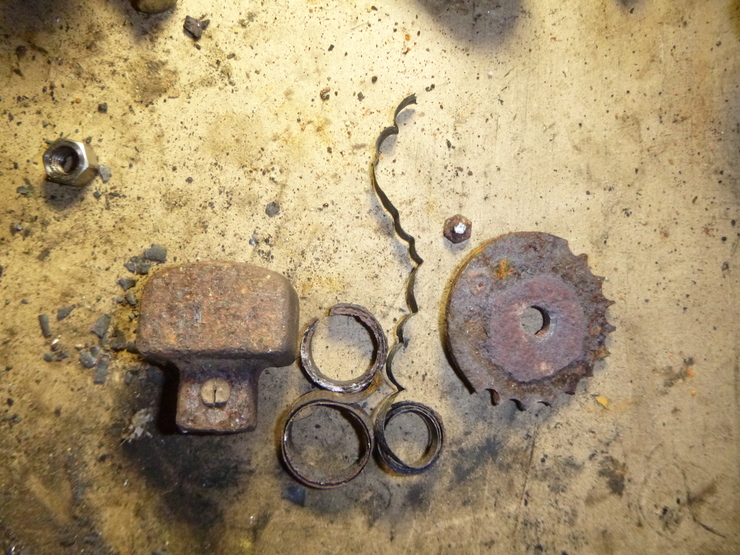
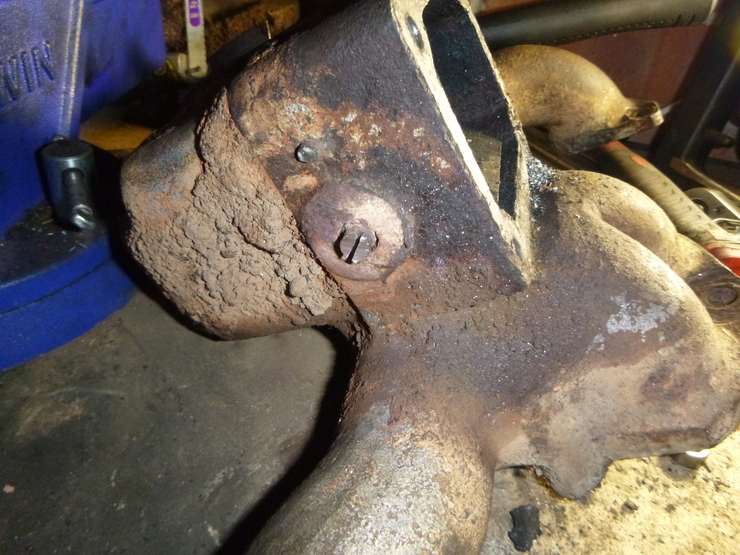
There is some good news, which is that the butterfly valve is stuck in the “hot” position, where the exhaust gas is routed out directly. It’s also the case that later models of this engine removed this mechanism, and there are various reports on the internet of people removing this mechanism and having no trouble in cold weather.
So, my plan now is to simply tidy up the exterior by removing the protruding shaft and fixing bolt, and applying a few tack welds to make sure it doesn’t move in the future. After that, I’ll need to remove the rust and re-paint it.
Sanding the exhaust manifold is going to be painful since it’s also rusted on the interior, so I’m going to try the electrolysis method floating around on the internet. I’ll do a proper write-up of that if it’s successful. It’s fairly important to get this part fixed, since a new “swan-neck” type manifold like this is about $800.