Land Rover - Differential pinion, engine disassembly
Universal joints
I’ve decided to finish these off later since I wasn’t enjoying the work, and I’ve found a way to continue most of the front end without them (I can insert the swivel pins, but not tighten them down, and everything stays more or less in place.)
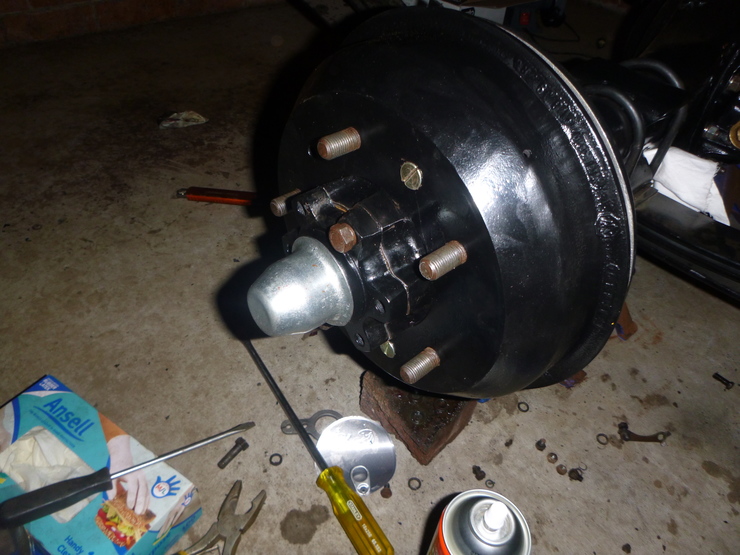
Hubs and drums
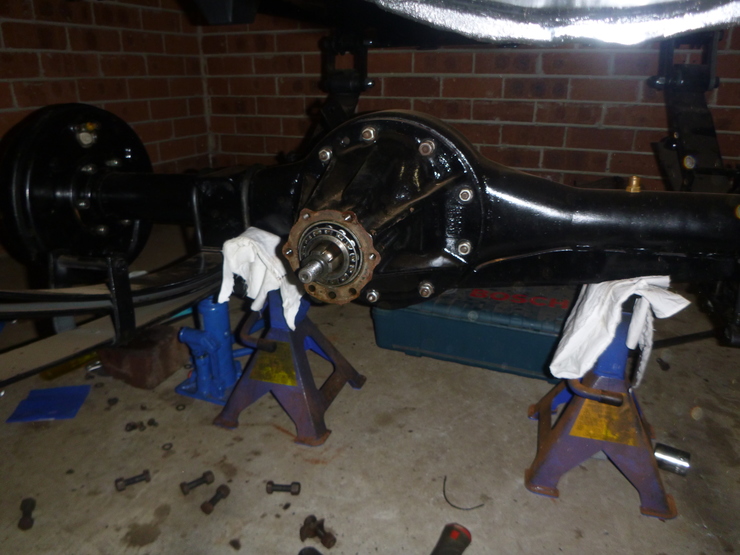
I’ve effectively finished the rear axle now, with the rear hubs and drums going on, and the rear differential pinion being finished (see below). This is good news since the axle grease seems to have some sort of irritating effect, so the skin on my hands can take a bit of a break…
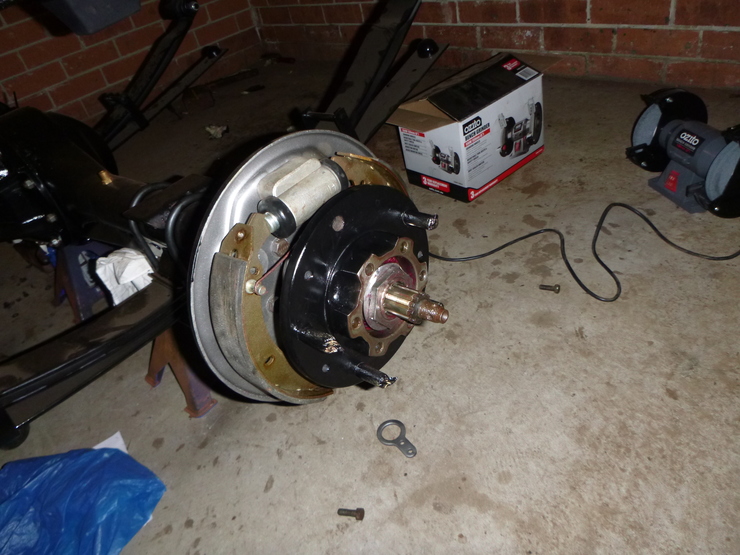
The front axles are similar, but I haven’t got the hubcaps fully installed since I don’t have the stub axles in. I’m also using a couple of the old bolts for the driving members, just until I get new ones.
Differential pinion
This is done, despite a bit of drama with the replacement gaskets I ordered - the internal shape is wrong, since they have a flat part at the bottom that rubs against the bearing you can see in the photo below, and stops the washer going on. I’ve also only got a photo of the disassembled pinion, since I forgot to take one after painting the visible/exposed bits and putting it all back together.
Engine stripping
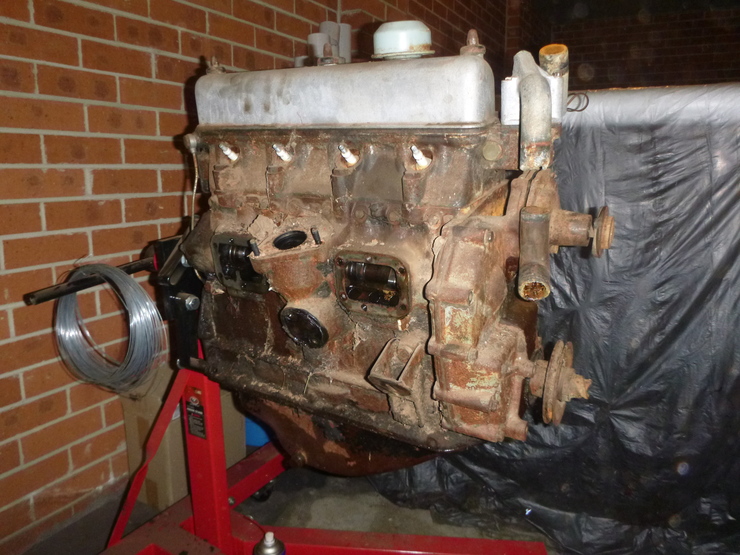
Quite a lot going on here - I had originally intended to have the head off and possibly paint the block this weekend (depending on the condition of things), but I took a bit of a break since I’ve slightly injured one of my wrists - nothing dramatic, it’s just too sore to apply any serious force.
Anyway, the overall condition of things is mixed. I didn’t get the head off, but I took a peek inside the cylinders through the spark plug holes, and cylinder 2 has some corrosion inside - the rest are fine. You can see it on the first photo, where it’s been blowing out of the exhaust port.
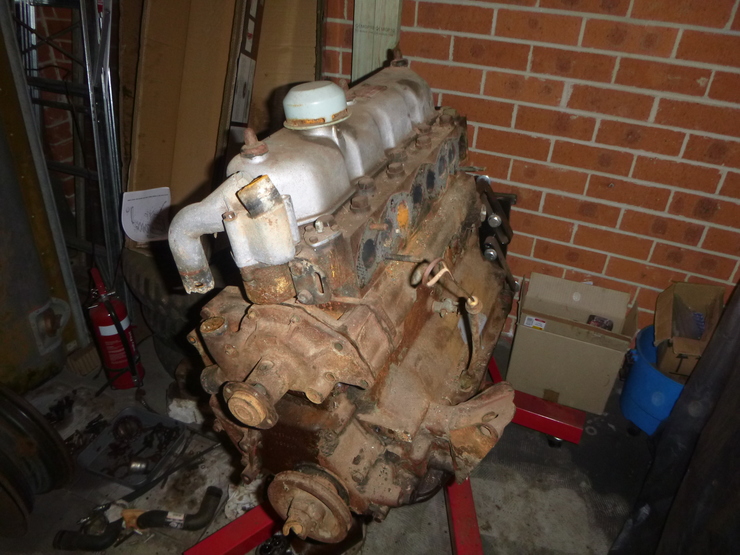
The stuff I managed to strip off included the dynamo, which is in quite poor condition, and had one of the brackets snap (it was already cracked). I also removed the distributor, which seems to be in good shape, and the inlet and exhaust manifolds along with the carburettor, which seem to be in good shape but I noticed the thin vacuum hose to the dsitributor has severed, so that will need some attention.
After that, I took the water pump off, which was very reluctant to let go due to one of the studs having a bit of corrosion on it. The pump itself has some corrosion but should come up fine, since the bearing spins freely. The aluminium thermostat output, also visible in the first picture, has a severely stuck bolt holding it in, and has some corrosion on the output pipe. I’m not sure what I’ll do about this yet.
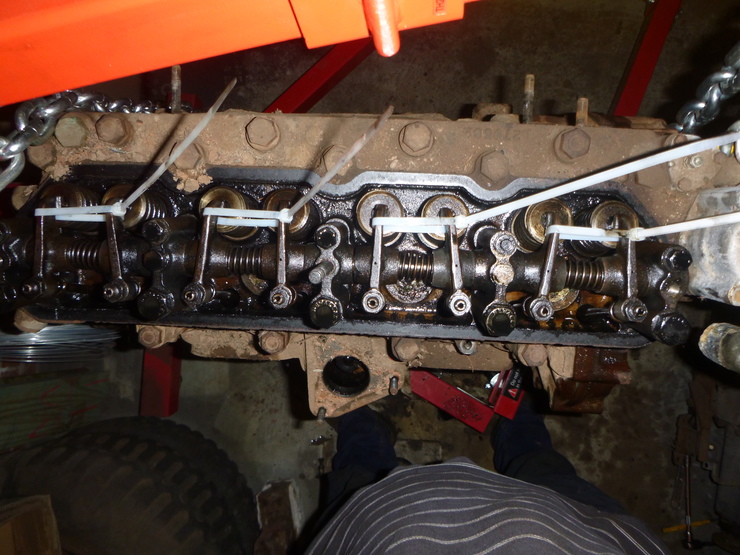
After that, I pulled off the fuel pump, engine mounts, crankcase breather and oil filter, all of which seemed in good condition. This exposed the camshaft, which also seems to be in good condition.

After these were done, I pulled off the rocker cover just to see what sort of condition they were in, and happily they look very good.
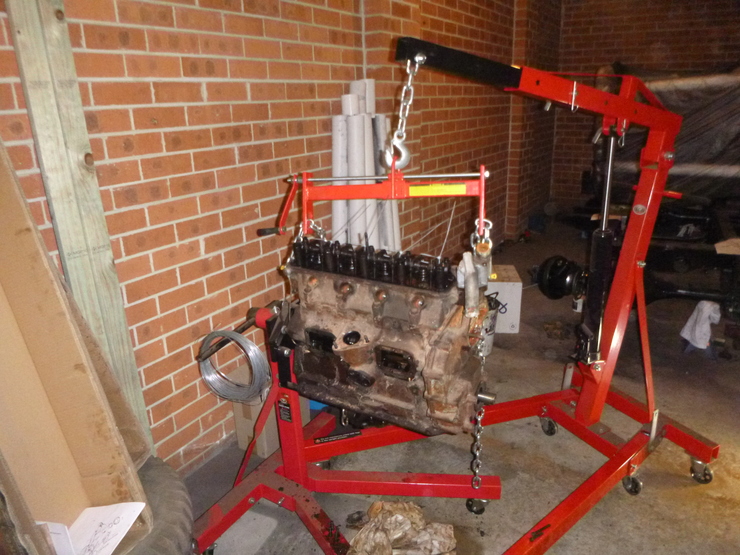
I moved on to removing the sump (uneventful, and in good condition) and the front cover after that, which required the cumbersome arrangement of engine crane and block stand you can see here - the problem was that the starter dog was stuck fast, and needed some pretty serious force applied to the front end of the motor, but I didn’t want to take my chances applying that much force to the engine stand alone. So, I took half of the weight of the engine with the crane, and after beating a 50cm shifting spanner with the heaviest hammer I could find, the starter dog came loose and the front cover of the engine could gradually work its way off. Interestingly, it got stuck on the same stud as the water pump.
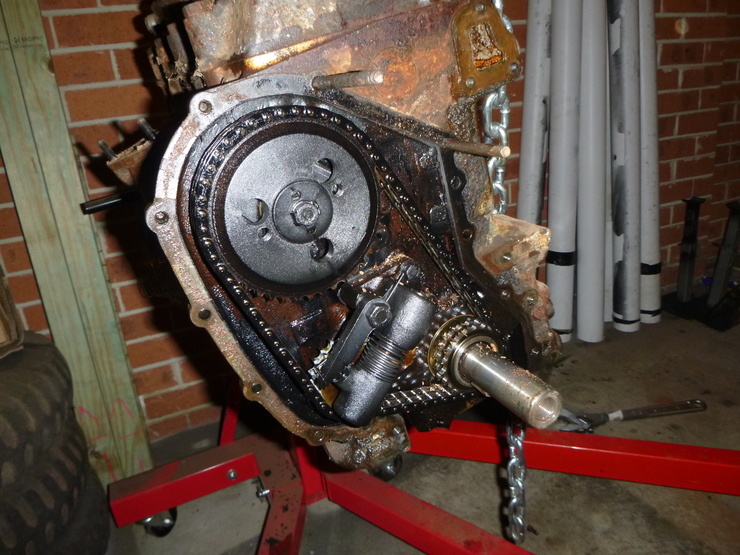
Happily all the timing gear is in really good condition, including the tensioner which is a common source of problems. The gunk visible in the photo is what fell in while I was removing the front cover.
However, given the condition of the waterways, and the thick caked-up grease on the outside of the engine, I think it’s a good idea to get the engine head and block chemically cleaned. The places that clean engine blocks are also the same places that do machining and such, so I’ll probably have the bores and mating surfaces machined while the engine is out and disassembled. I’ll start contacting places and getting quotes once I’ve got some good photos of the inside of the cylinders, which means I need to get the head off.
Before I do that, though, I’ve found some exposed parts of good paint, which I’ll use to verify that my colour-matched cans are correct.