Land Rover - Welding, painted chassis
Finished welding
I forgot to take pictures, but I finished welding the battery tray replacement part. It came up reasonably well, but I struggled to keep a consistent bead because of the pitting and surface rust around the area. Still, worked out OK. Also welded the small cracks in the breakfast panel mounts, which came up much nicer since the metal was clean and smooth.
Dirt in chassis
I was going to start painting last weekend, but I found a heap of compressed dirt in one of the chassis crossmembers. It took the whole weekend to clean out since there was so much and it was so hard to extract; I ended up filling half of a 9-litre bin with the dirt that came out. I couldn’t use compressed air or water to help for the first half either, since it wouldn’t make a dent in the internal dirt-berg. I eventually got it out after many hours with some fencing wire and compressed air.
Spray booth
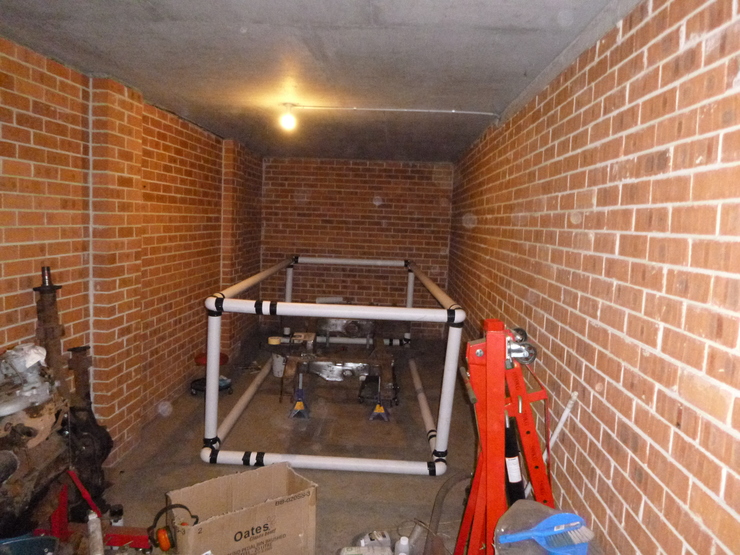
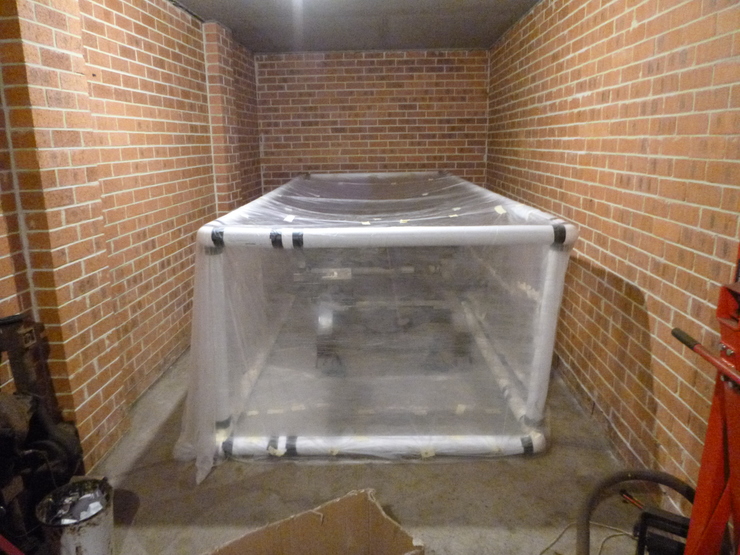
I constructed a spray booth for the chassis, to stop any possible drips or overspray from getting into the rest of the garage, and to paint the chassis in a dust-free environment. I know it’s not square, but two of the pipes were about 5cm too long and I really couldn’t be bothered cutting them. It’s held together with tape rather than plumbing cement since I wanted to reuse the pipes for later paint jobs.

After putting the plastic on, I realised that it was a bit too lightweight and would brush on the chassis due to the wind when I walked past it, so I taped bolts around the outside at the bottom.

Paint prep
After that, it was time to mask off the bit I’d already painted and wipe the chassis down with acetone to remove any residual grease or dust. I left the end exposed since I missed a patch when I did my trial paint run.

Painting
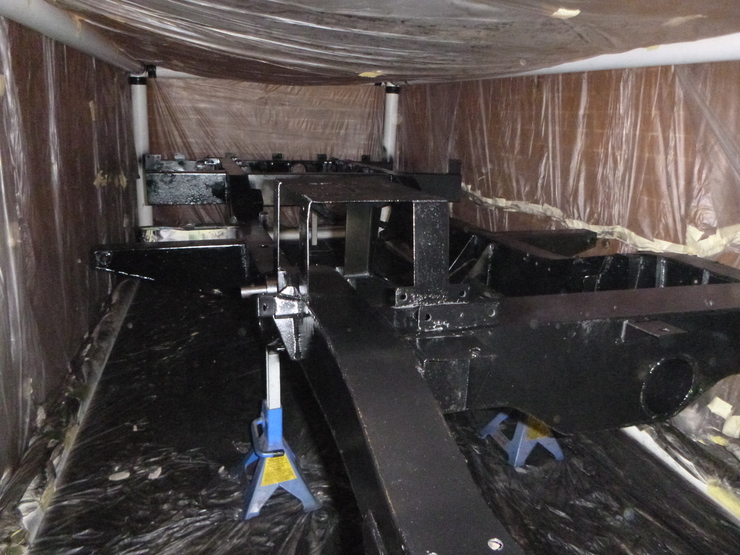
Over the course of two days, I primed and painted almost all of the chassis. I used a rust-converting primer, as well as a special hose for the interior bits of the chassis where it would fit.
There are still a few spots missing where the axle stands are holding it off the ground, and a couple of spots that I simply missed, so I’ll let it dry and shuffle things around before doing those final few bits. It’s coming up very nicely - as usual, the camera flash shows up all of the tiny lumps in the surface, most of it looks (and feels) as smooth as glass, except for areas with rust pitting.
Annoyingly, I had one paint run, on the front crossmember of all places - one of the most visible spots when the car is back together. I cleaned it up the best I could, but I’ll have to survey the damage once it’s dry. Here’s a sneak peek of the chassis. The brown-looking bits on the welds of the chassis rail at the front are reflections of the lights, not unpainted patches!
